
If you’re having issues with your website not displaying correctly or not displaying at all, you can switch on the error logs to see if you can get a better idea on what is happening.
To do this, go to Manage Hosting Packages and click on ‘CP Login’ under your package name.

Once you’re in the hosting control panel, then navigate to the ‘Web Tools’ section and click on ‘PHP Configuration’.
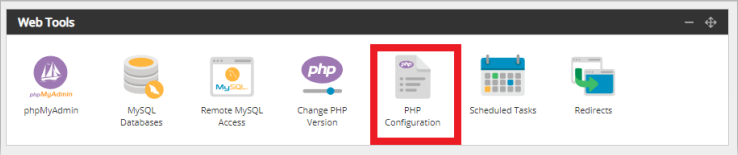
In there, select ‘Enabled’ for display_errors.

Once you’ve saved that configuration, you’ll be able to go into the error logs to see what issues the site is having.
You can find the logs in the control panel under ‘Logs & Stats’.
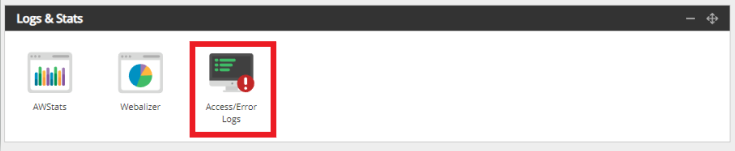
And they look like this:

As you can see from the screenshot above, the issue we’re having with this site is that the webspace is missing the index.php file. So we’d need to add this back in, and then we can test the site again to see what’s happening.
Once you know what the errors are, you can search for an answer online, or, as always, you can get in touch with us!