
When you’re building your website, version control is a major part of it. Sure, you could just keep files on your desktop, naming them “version 1”, “version 1.1”, “version final”, “version revised final”, and so on, but wouldn’t it be great to have a website where the version control is beautifully organised, giving you the ability to swap between versions, and gives you a copy of your website located somewhere other than just on your hosting package and your home computer?
Welcome to Git
(If you’ve used Git before, you can skip ahead to the main directions, but if you haven’t, let me explain.)
Git gives you easy version control, where you have a main version, and can then fork off from that main version to let you make changes without touching the original version.
Think of it like that hot new meme that’s going around. Everyone knows the original. But everyone’s also been making their own versions, all following the same theme. You can trace back to the original, but you might like the version your best friend passed along more.
How do I use Git?
You can set up Git on your main computer, making it easy for you to code away on there and then push to another server. There are a lot of tutorials out there to help you too. Aditya Sridhar’s guide on FreeCodeCamp explains things really well, from what Git is to how you use it to how you set it up. And Roger Dudler’s git – the simple guide is a great reference for those beginning commands.
You can also use an online repository to hold your code. At Eco Web Hosting, we use GitLab, but there are plenty of others out there.
How do I use Git to manage my website?
You can set up an online repository to hold your code, then push to your website from there. I’ll take you through the steps using my test project on GitLab and test site on an Essential package here. This guide is designed for anyone who’s bought a hosting package from us, so if you’re with another company, things might be different for you.
Set up SSH access for your website
We offer SSH access for all our hosting packages, and our Support Knowledgebase has a great tutorial on how to set it up. I went with the two-factor authentication method because I already had Google Authenticator on my phone. Set up the password, get Google Authenticator working, and you’ll be able to connect.
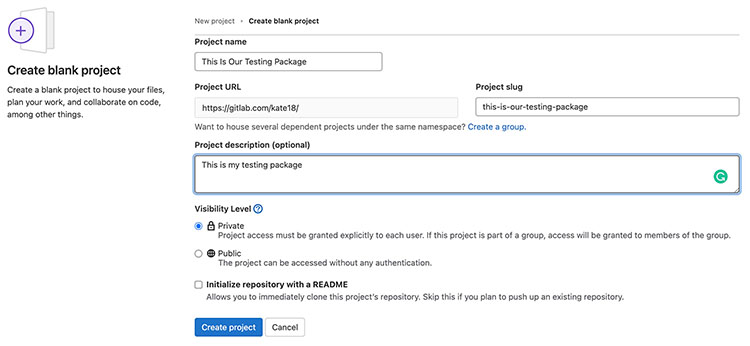
Set up your project in GitLab
If you have an account on GitLab already, just click on the New Project button, give it a name, and you’re ready to get started. Keep the browser tab with all the Command Line instructions open, because you’re going to need some of those shortly.
Create a new file in your project
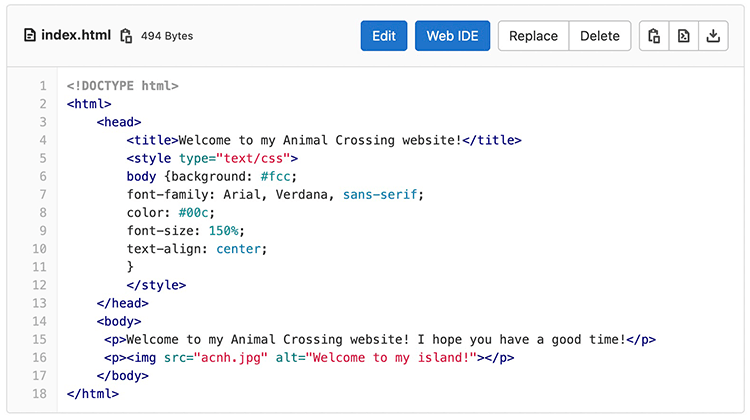
If you don’t already have website files ready to go, you can test all this out with a simple HTML file. Click New File, and get typing.
If you already have files, whether they’re HTML files, images, or whatever, you can also upload them using the Upload File button.
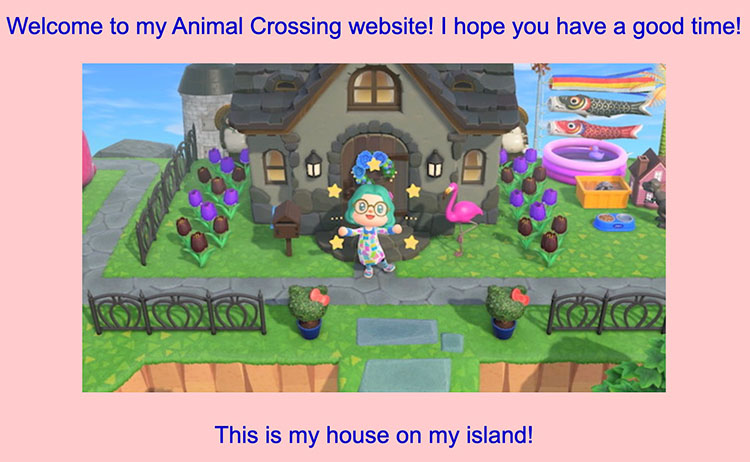
In this case, I had one image and I made a very very simple page to show it off.
SSH into your hosting package
Open up a terminal window on your computer, and SSH into your hosting package. If you’ve used two-factor authentication, you’ll need to make sure you have your authenticator open as well.
The command is:
ssh yourhostingpackage.tld@ssh.stackcp.com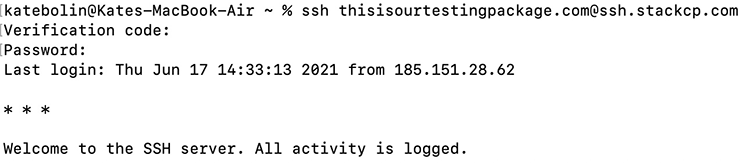
If you ever aren’t sure, you can always find it on the SSH Access page in your web hosting control panel.
Check that Git is installed
If you’re able to SSH into your hosting package, you’ll have Git installed, but if you’re like me and always need to double-check, type in:
git --versionThis shows you what version you have installed.
Set up your global configuration
Since you’re using GitLab, you’ll need to make sure that GitLab knows exactly who’s using this server. You’ll need to know your GitLab username and email address.
First, type in:
git config --global user.name youWhere you is replaced by your username.
Then type in:
git config --global user.email emailWhere email is your email address.
Once you’ve done those, you can check by typing in:
git config --global --list
Go into your website’s main folder
If you type in:
lsYou should see a directory called public_html.
That’s where your website will live. You can move into it by typing:
cd public_htmlNow you’re ready to get connected!
Convert your public_html directory into a Git repository
GitLab needs to know it’s okay to put files in this directory. So, once you’re in your public_html directory, type in:
git initThis sets everything up for the big connection.
Connect your GitLab project with your public_html directory
Type in:
git remote add origin git@gitlab.com:username/projectpath.gitWhere username is your GitLab username and projectpath is your project’s name.
Once it’s finished, you can check by typing in:
git remote -vWhich’ll show you what you’re connected to.

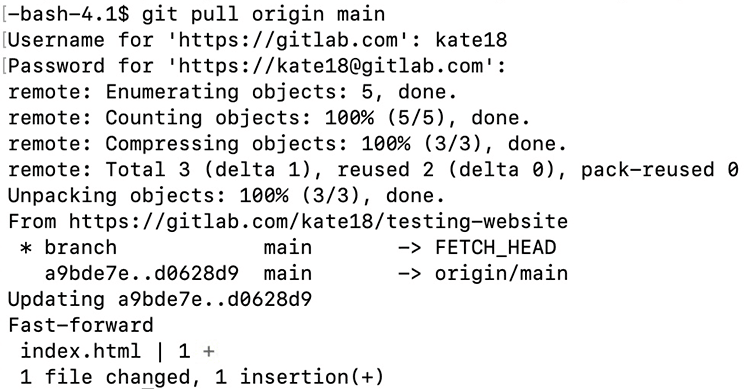
Push everything in your repository to your website
Now it’s time for the fun part. Type in:
git pull origin mainThat pulls everything in main (your primary code version) from the origin (your GitLab project).
You’ll need to enter in your GitLab username and password, but once you’ve entered those in, it’ll do the magic.
Enjoy your new website
And there you have it — GitLab, your website, and version control all set up!
What can I do now?
Once you have everything set up, you can do a lot more with GitLab and your website. Set up an SSH key, and you won’t need to keep logging into GitLab every time you make a push. Create a fork of your existing project, and build entirely new websites based on your main template. Add more users to your project, and get everyone on your team working on the same version.
What if I have a problem?
If you’re having trouble with these steps, our Support Team is on hand to talk you through it. Good luck!
(Featured image by Kevin Ku on Unsplash.)